
Browse articles
- Getting started
- How Monument models finance
- Revenue from resourcing
- Fixed fees
- Budgeting costs
- Recording expenses
- Recording revenue entries
- Going further
- Formula based pricing and construction cost
- Recurring and periodic fees
- Revenue from expenses
- Modifiers: contingencies and discounts
- Progressive billing
- Pricing templates
- Operational expenses
- Control access to business finances
- Control access to rates
- Control who can create projects
- Control project administration
- Control staff and team management
- Control expenses and claims
- Control report definition editing
- Control access to contacts
- Give full project control with Owner
- Manage project work without changing money
- Let project members edit tasks safely
- Share a project safely with Viewer
- Let a team lead coordinate shared work
- Share teammate profiles without management access
- Keep team members focused on their own work
Start your first project
Give a new commission a code, a name, and a client from the schedule, then move into its own working view.
What you'll achieve
Create the project that the schedule, resourcing, fees, and invoices all attach to.
You'll end up with: A project on the schedule with a code, name, and client attached, ready to be broken into stages.
Everything else attaches to a project
A project is the one thing every part of Monument points back to. The schedule needs it to place a timeline. Resourcing needs it to know whose time counts against what. Fees, invoices, and reports all read from it too. So the first move on any new commission is creating that anchor point. A code and name are enough to get moving, and the same form also lets you add a client and optional dates. Stages and money can come later.
We'll create the project this whole journey follows: Riverside Apartments, for City of Hawthorn.
Projects start on the schedule, not a separate page
Monument doesn't have a standalone "create project" screen. Open the same create dialog from either the schedule or the Projects page, then continue planning on the schedule.
- 1
From the schedule, click New project to open the form.
- 2
Set Template to No template. Choosing a template instead copies its stages and starts the project with a fee already planned.
- 3
Monument generates the project code automatically. Keep the smart default and move on to the name.
- 4
Name the project Riverside Apartments.
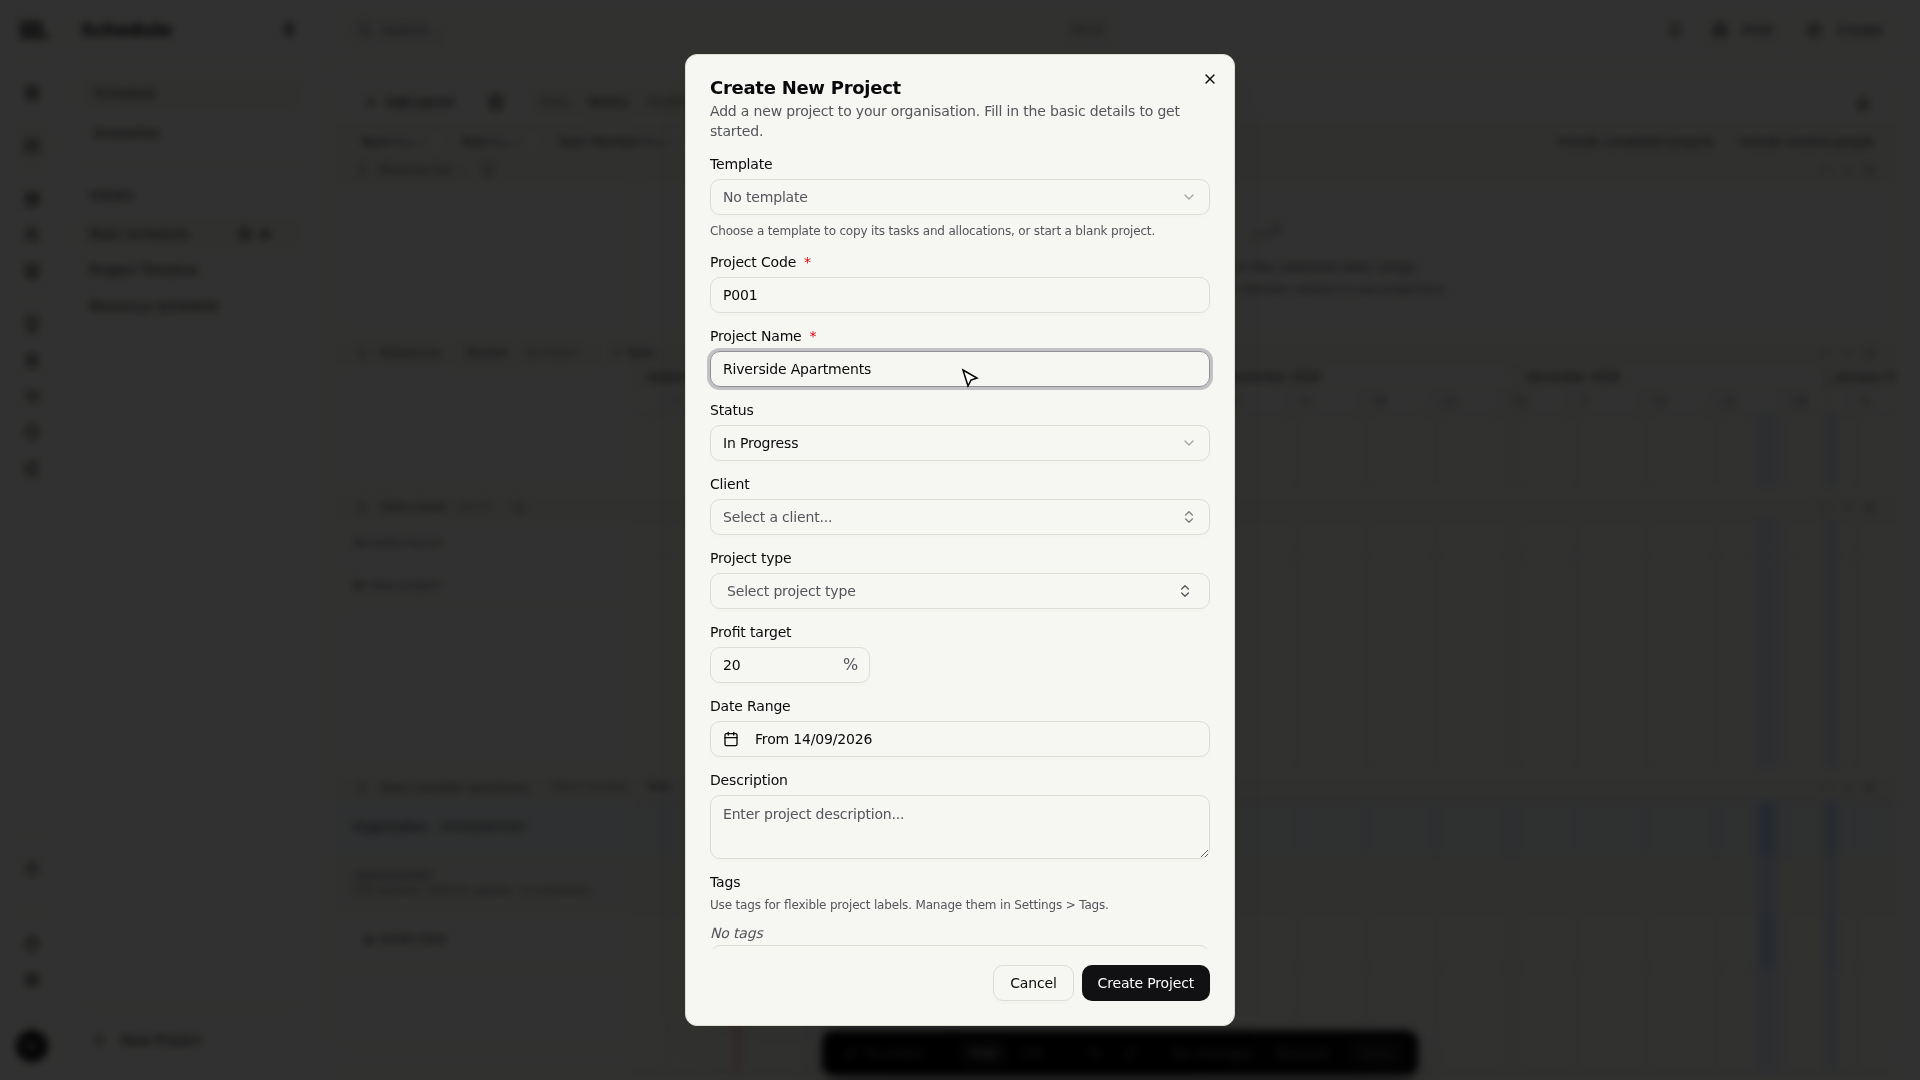
The code rides alongside the name everywhere Monument shows this project: schedule rows, reports, invoice headers. Monument generates it so every project starts with a consistent, unique identifier and you can keep the default without inventing one. To control the pattern, open Settings and follow the Codes and numbering video.
Add the client without leaving the form
A project needs to know who it's for before fees and invoices can point anywhere sensible. If the client hasn't worked with the firm before, Monument lets you create the contact inline, so a brand new relationship doesn't stall the project you're trying to start.
- 1
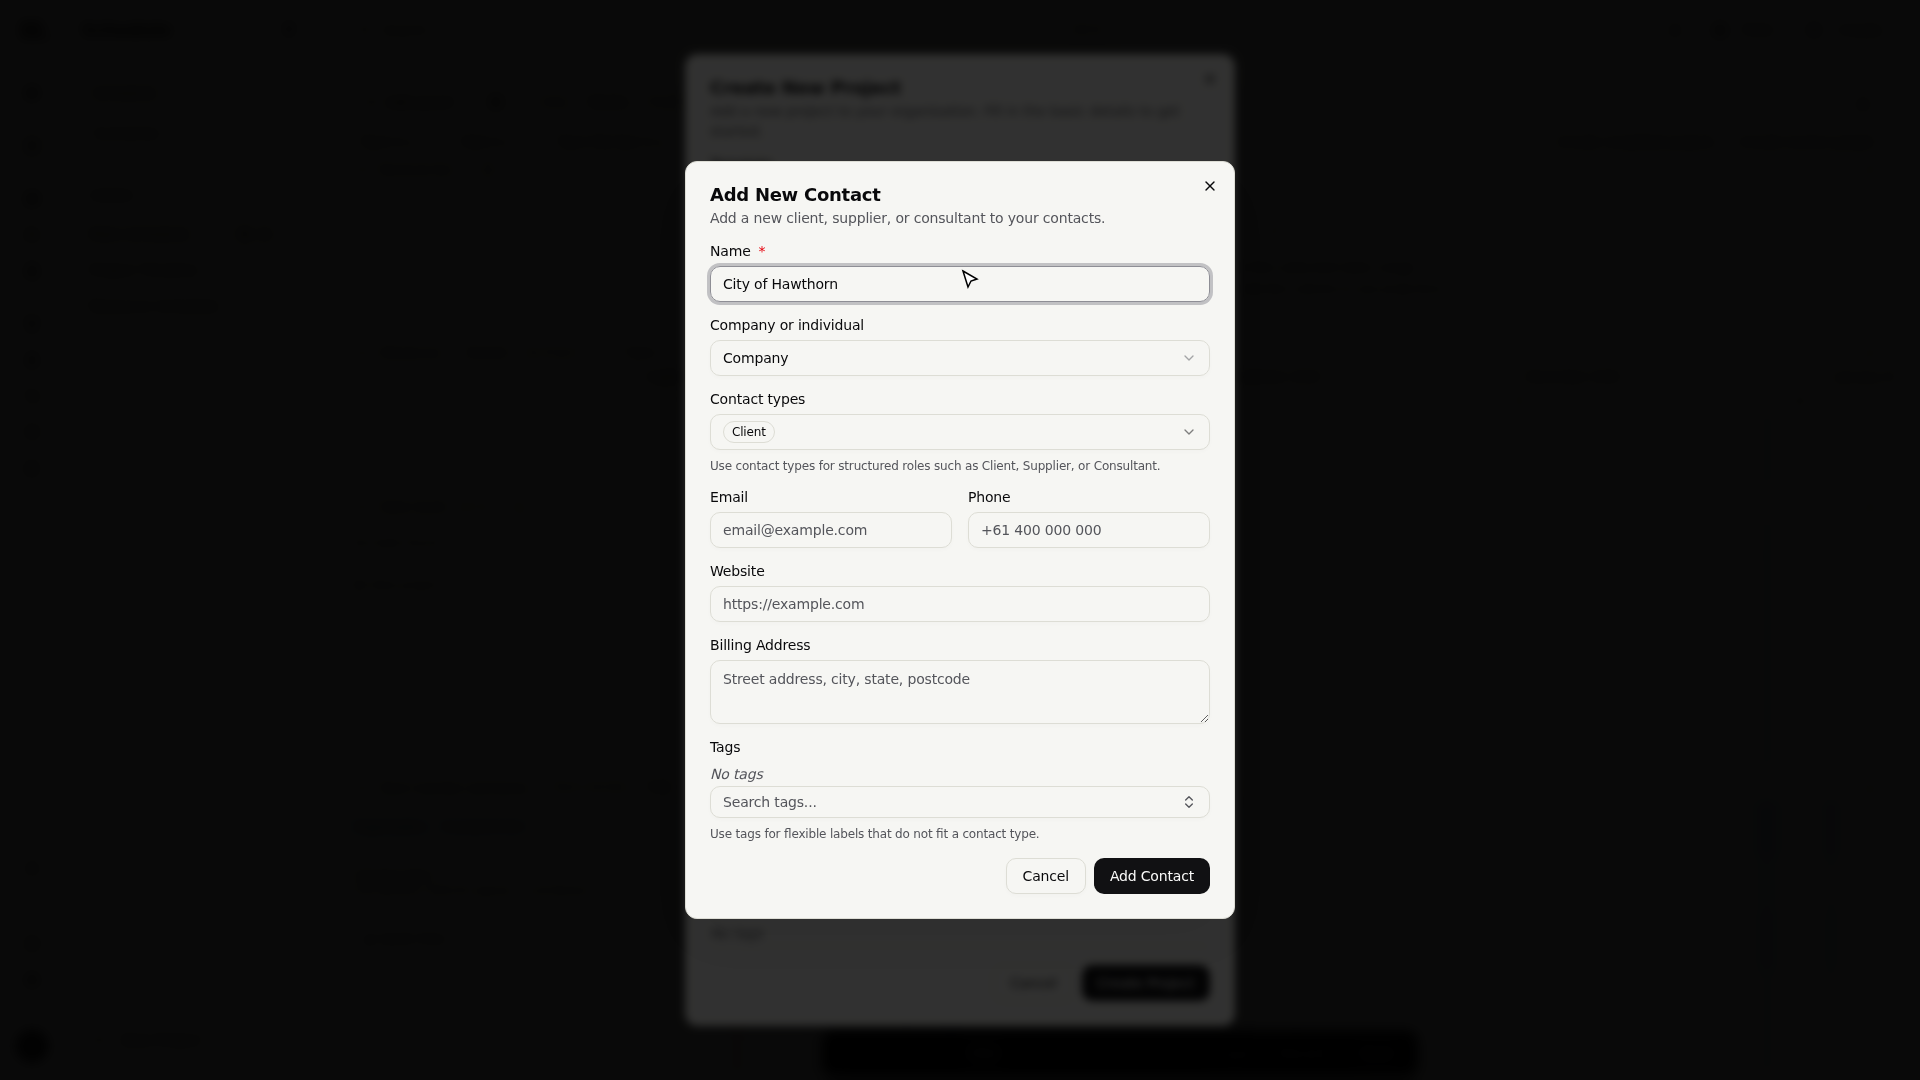
Open the client field and choose New Contact.
- 2
Enter the client's name, City of Hawthorn, and save.
- 3
Click Create. The project lands on the schedule with the client already attached.
Saving a client here doesn't just attach it to Riverside Apartments; it files City of Hawthorn away as a reusable contact. The next commission from the same client is a pick from a list, not a re-type.
What you get
Riverside Apartments now exists as a single row on the schedule: a name, a code, a client, and no stages yet, since you chose No template. Its start date already defaults to today, so the row isn't dateless, it just hasn't been broken into stages. This article only sets up the container; the next one is where it actually takes shape.
Troubleshooting
- No New project row in sight? You're not on the schedule or the Projects page. Open the create dialog from either one, then navigate back to the schedule to continue planning.
- Need a different numbering pattern? Keep the generated code here, then configure the shared pattern in Codes and numbering instead of renaming projects one at a time.
Where this fits next
Riverside Apartments exists, but it's still one row with no child stages. Next: Model your project, where you draw its stages directly on the timeline and link them so the schedule reschedules itself.
Search Monument help
Search help articles and open a result.